FIMER Inverter Wi‑Fi Connection Troubleshooting
Step‑by‑step instructions to troubleshoot FIMER inverter Wi‑Fi connectivity issues.
Table of Contents
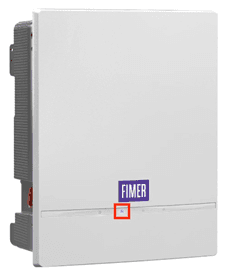
FIMER - Indication of a Wi‑Fi Issue
Blue indicator light blinking
FIMER - Step 1: Access the Inverter Interface
-
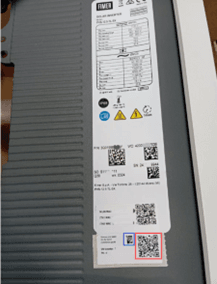
On your phone, Go to wifi setting and search for inverter network (Abb or Fimer with the correct serial number).
-
Scan the QR code located on the side of the inverter (marked with a red box). The QR code is typically accompanied by the logo shown in the blue box nearby.
FIMER - Step 2: Log In to the Inverter Portal
Open a web browser on a connected device (e.g., smartphone, laptop, or computer).
-
Enter the IP address 192.168.117.1.
-
Input the login credentials:
-
Username: ADMIN
-
Password: 0010
Note: For FIMER 5kW/6kW inverters:
-
Username: utica001
-
Password: utica001
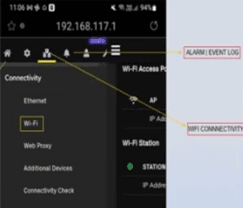
FIMER - Step 3: Navigate to Wi‑Fi Settings
-
From the main interface, select Menu. Locate and click the 'Wi‑Fi Connectivity' option.
-
Select 'Wi‑Fi' to proceed to network configuration.
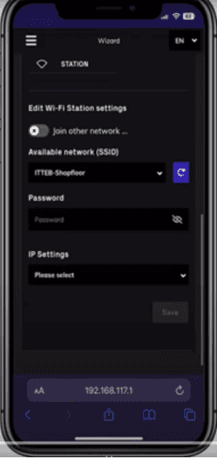
FIMER - Step 4: Connect to Your Wi‑Fi Network
On the Wi‑Fi setup page:
-
Choose your Wi‑Fi network name (SSID) from the available list
-
Enter the correct password for your Wi‑Fi network
-
Confirm the settings to establish the connection
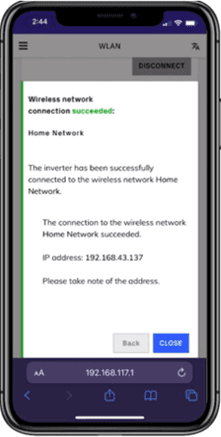
FIMER - Step 5: Verify Successful Connection
-
If all steps are completed correctly, you will be directed to the system monitoring page.
-
You can now view real‑time solar generation data and system status.
FIMER - Key Notes
-
Ensure the device used for setup is connected to the inverter’s local network during configuration.
-
If connection issues persist, confirm Wi‑Fi signal strength near the inverter and verify network credentials.